9-Inch Propeller Guard for 9.9–20 HP Outboard Motors | SeaSierra
9-Inch Propeller Guard for 9.9–20 HP Outboard Motors | SeaSierra is backordered and will ship as soon as it is back in stock.
Worry-free returns
Worry-free returns
Shop with confidence. If you’re not completely satisfied, eligible items may be returned within the return window, provided they are unused and in original packaging.
If the return is due to our error or a defective item, we’ll make it right.
Please contact us before returning any item.
Delivery and Shipping
Delivery and Shipping
Orders are typically processed within 1–2 business days.
U.S. orders usually arrive within 6–15 days, depending on stock location and destination.
International delivery times may vary due to customs processing.
Tracking information will be provided once your order ships.

9-Inch Propeller Guard for 9.9–20 HP Outboard Motors | SeaSierra

9-Inch Propeller Guard for 9.9–20 HP Outboard Motors | SeaSierra is backordered and will ship as soon as it is back in stock.
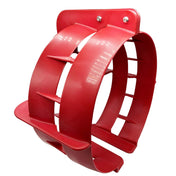
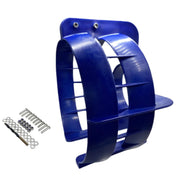
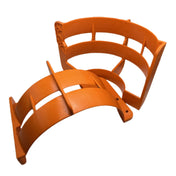
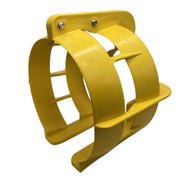
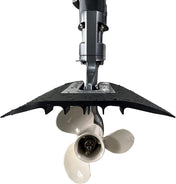
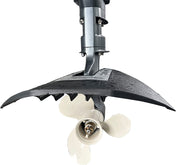
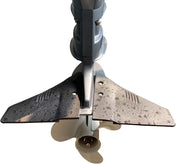
Protect your propeller and improve visibility around the stern with this bright yellow SeaSierra 9-inch propeller guard. Designed for many 9.9–20 HP outboard applications, the bolt-on guard installs beneath the cavitation plate and helps shield the rotating propeller from contact with people, marine life, and submerged obstacles.
- Manufacturer: SeaSierra
- Guard Size: 9 inches
- Color: Safety yellow
- Material: Rigid polypropylene plastic with 304 stainless steel hardware
- Package Dimensions: 32 × 29 × 18 mm
- Package Weight: 1.495 kg
Compatibility
This 9-inch propeller guard is designed for many 9.9–20 HP outboard motors and is suitable for propellers up to 8.5 inches in diameter. Before installation, verify that the propeller and motor geometry provide adequate clearance inside the guard. The required distance from the propeller shaft to the cavitation plate is approximately 4.25–5.5 inches. Big Foot and High Thrust outboard models may require an 11-inch propeller guard instead.
The guard is intended for bolt-on installation and requires drilling through the appropriate mounting surfaces. Fitment can vary by engine design, propeller, trim-tab position, and cavitation-plate dimensions, so confirm clearance before drilling.
Package Contents
The package includes:
- 1 propeller guard
- 8 sets of installation bolts
- 1 drill
Features and Benefits
- Bright safety-yellow polypropylene construction is easy to see from a distance.
- Rigid, lightweight construction is designed for marine use and does not oxidize like unprotected metal.
- Helps protect the propeller and reduce the chance of accidental contact with rotating blades.
- Can improve propeller visibility when towing or maneuvering around swimmers, docks, and shallow-water areas.
- May help improve low-speed handling and vessel control when correctly fitted and installed.
- Bolt-on design installs with common drilling tools; professional installation is recommended if you are unsure about drilling or alignment.
- The 9-inch size is intended for compatible 9.9–20 HP outboard applications and propellers up to 8.5 inches in diameter.
Installation Instructions
Tools Needed:
- Drill with a 5/16-inch bit
- The included installation bolts, washers, and Nyloc nuts
- Basic hand tools suitable for tightening the hardware
For the 9-inch propeller guard:
- Use the required bolt sets for the upper section of the guard.
- Use the remaining required bolt sets for the lower section and skeg mounting point.
Installation Steps:
- Confirm that the propeller is compatible with the guard and that there will be equal clearance between the guard and the propeller throughout rotation.
- Position the guard beneath the cavitation plate, as far forward as practical, while maintaining proper propeller clearance.
- For 9-inch, 11-inch, 13-inch, and 14-inch guards, remove the trim tab beneath the cavitation plate if it interferes with the guard or mounting position.
- Mark the mounting locations, then drill through the cavitation plate and guard as required for the upper mounting hardware.
- Install the bolts, washers, and Nyloc nuts, and leave them loosely tightened until the guard is aligned.
- Drill the required mounting hole through the lower skeg, then install the bolt, washer, and Nyloc nut.
- Check propeller clearance again and tighten all mounting hardware securely without over-tightening.
Important: Never operate the motor until the guard is securely fastened and the propeller rotates freely without contacting the guard. Inspect the guard, mounting hardware, and clearance regularly. Follow the outboard manufacturer's safety instructions, and consult a qualified marine mechanic if you are uncertain about fitment, drilling, or installation.
Payment & Security
Payment methods
Your payment information is processed securely. We do not store credit card details nor have access to your credit card information.