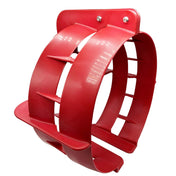
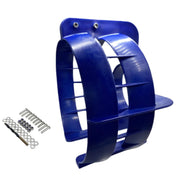
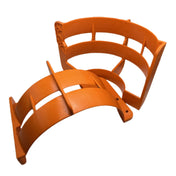
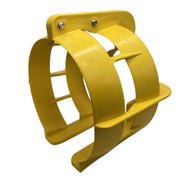
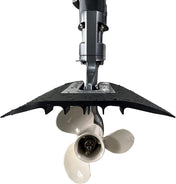
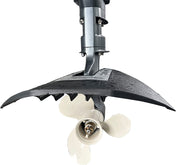
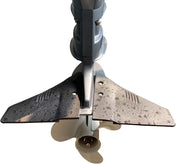
Sterndrive Installation Hardware Kit for MerCruiser Alpha One and Bravo Drives – Replaces 11-859116Q01, 859116Q01
Sterndrive Installation Hardware Kit for MerCruiser Alpha One and Bravo Drives – Replaces 11-859116Q01, 859116Q01 is backordered and will ship as soon as it is back in stock.
Worry-free returns
Worry-free returns
Shop with confidence. If you’re not completely satisfied, eligible items may be returned within the return window, provided they are unused and in original packaging.
If the return is due to our error or a defective item, we’ll make it right.
Please contact us before returning any item.
Delivery and Shipping
Delivery and Shipping
Orders are typically processed within 1–2 business days.
U.S. orders usually arrive within 6–15 days, depending on stock location and destination.
International delivery times may vary due to customs processing.
Tracking information will be provided once your order ships.

Sterndrive Installation Hardware Kit for MerCruiser Alpha One and B...

Sterndrive Installation Hardware Kit for MerCruiser Alpha One and Bravo Drives – Replaces 11-859116Q01, 859116Q01 is backordered and will ship as soon as it is back in stock.
Product Details
This Sterndrive Installation Hardware Kit provides replacement mounting hardware for securing compatible MerCruiser drive units to the bell housing or transom assembly. It is listed for MerCruiser Alpha and Bravo sterndrive applications and is intended for use when servicing or reinstalling the drive unit.
The kit replaces or cross-references Mercury/MerCruiser OEM part numbers 11-859116Q01 and 859116Q01. The catalog description for 11-859116Q01 identifies it as a sterndrive installation hardware kit used to mount the drive unit to the bell housing.
- Designed for sterndrive installation at the bell housing or transom assembly.
- Listed for compatible MerCruiser Alpha and Bravo drive applications.
- Supplied as an aftermarket replacement for the referenced OEM numbers.
Part Number Matrix
Use the following references to compare the replacement kit with your existing hardware or service documentation.
| Brand | Part Number | Reference Type |
|---|---|---|
| Mercury/MerCruiser | 11-859116Q01 | OEM reference |
| Mercury/MerCruiser | 859116Q01 | Cross-reference |
Engine & Model Compatibility
Confirm the drive family and existing hardware reference before ordering. The available catalog evidence identifies this installation hardware for MerCruiser MC-1, R, MR, Alpha and Bravo applications; the kit is not confirmed for every year, serial range or individual configuration within those families.
| Brand | Drive Family | Application | OEM Part No. |
|---|---|---|---|
| MerCruiser | MC-1 | Drive-unit mounting to bell housing | 11-859116Q01 |
| MerCruiser | R / MR | Drive-unit mounting to bell housing | 11-859116Q01 |
| MerCruiser | Alpha / Alpha One | Drive-unit mounting to bell housing | 11-859116Q01 |
| MerCruiser | Bravo | Drive-unit mounting to bell housing | 11-859116Q01 |
Technical Specs
- Product Type
- Sterndrive installation hardware kit
- Installation Location
- Drive unit to bell housing or transom assembly
- Application
- Compatible MerCruiser MC-1, R, MR, Alpha and Bravo drive applications
- OEM Reference
- 11-859116Q01
- Cross-Reference
- 859116Q01
- Material and Quantity
- Verify the supplied hardware type, finish and quantity against the product packaging and your service requirements before installation.
What’s in the Box
- 1 x Sterndrive installation hardware kit
- Mounting hardware intended for the listed drive-unit installation application
Exact hardware configuration and quantity should be confirmed against the package label and the service manual for your drive model. This listing does not include a complete bell-housing, transom-service or bellows service kit unless separately stated.
Installation Notes
- Verify the drive model, existing hardware and OEM reference before beginning work.
- Make sure the engine is off, the ignition is disabled and the battery is disconnected according to the applicable service procedure.
- Remove the existing mounting hardware and inspect the studs, threads, bell housing and mating surfaces for damage, corrosion or contamination.
- Align the sterndrive unit with the bell housing, making sure the driveshaft splines and shift linkage are correctly engaged.
- Install the supplied mounting hardware in the configuration specified by the manufacturer’s service manual.
- Tighten the fasteners in the prescribed sequence and to the correct manufacturer-specified torque. Do not rely on a general torque value or overtighten the hardware.
- After installation, complete the applicable shift-system, alignment and leak checks before returning the boat to service.
Troubleshooting & FAQ
How do I know if this kit fits my sterndrive?
Compare your drive family and existing hardware with the listed MerCruiser MC-1, R, MR, Alpha and Bravo applications. Also confirm that your existing part number matches 11-859116Q01 or 859116Q01. Year, serial number and individual configuration can affect fitment, so consult the correct service manual when those details are available.
Does this kit include the complete bell housing or transom assembly?
No. This listing is for the installation hardware kit only. Bellows, gaskets, hoses, clamps, bearings and other transom-service components are separate parts unless specifically included in the package supplied with your order.
What should I inspect before installing the replacement hardware?
Inspect the mounting studs, threads, bell housing, mating surfaces and surrounding transom assembly. Replace damaged components and remove corrosion or contamination before installation. If the drive will not align correctly, stop and identify the cause rather than forcing it into position.
Is a torque wrench required?
A torque wrench is strongly recommended. Use the torque specification and tightening sequence provided in the service manual for your specific drive and hardware configuration.
Is this an OEM part?
This listing is for an aftermarket replacement kit. The referenced OEM numbers are provided for identification and cross-reference only; the replacement is not represented as a genuine Mercury-branded component.
Can the OEM reference confirm fitment by itself?
The OEM reference is useful for comparison, but it should be checked together with the drive family, year or serial range when available, and the physical configuration of the existing installation.
Safety & Important Info
- Confirm the drive family, OEM reference and hardware configuration before ordering.
- Use the manufacturer’s service manual for installation sequence, torque values, alignment and final inspection.
- Do not reuse damaged, stretched, corroded or otherwise compromised mounting hardware.
- Professional installation is recommended when drive alignment, shift linkage or transom assembly service is required.
- This is an aftermarket replacement, not a genuine OEM component.
About Sea Sierra
- Marine Parts Focus — We supply replacement components for common marine service and repair applications.
- Application-Based Selection — Compare drive family, OEM references and service-manual requirements before installation.
- Replacement Value — Practical aftermarket alternatives for maintaining compatible marine systems.
Payment & Security
Payment methods
Your payment information is processed securely. We do not store credit card details nor have access to your credit card information.